Making spring flower prints using tubes, sponges and vegetable ends on white paper
Spring
Communication and Language
Understanding the World
Children use short cardboard tubes, sponge blocks and a trimmed celery end to make spring-like prints on white paper with bright paint. Adults place a small set of tools and flower photos within reach and keep attention on how children change pressure, spacing and tool choice as marks appear. Children may compare prints, revisit a preferred tool, and use gestures or words to share what they notice about shapes and colours.
Children explore spring flower imagery through printing with everyday tools and natural shapes. The focus is on noticing patterns, repeating marks, and experimenting with colour on white paper for strong contrast. Children may choose to name flowers they recognise, compare prints, and return to favourite tools to refine control. The experience can be revisited across several days as children’s ideas about “flower shapes” change.
Step-by-Step Guidance
1. Prepare a wipe-clean surface and tape down white paper so it stays flat during printing. Place aprons nearby and set up a clear drying area.
2. Pour small amounts of bright paint into shallow trays. Keep colours separate at first to make changes in colour easy to notice.
3. Arrange the printing tools in a simple line: sponges, tubes, forks, and the celery end. Place spring flower images beside the paper as a visual reference, not a template.
4. Introduce the area with a brief invitation to explore prints and patterns. Name a few tools and colours so children can request them.
5. Model one print only: dip or dab a tool, press onto paper, and lift straight up to reveal the mark. Keep the demonstration short and leave space for children to take over.
6. Allow children to choose tools and where to print. Offer extra paper when a child wants a fresh start or to try a new idea.
7. Support pattern-making by noticing what the child is doing (e.g. repeating circles, making lines for stems) and offering language that matches their actions.
8. If paint becomes muddy, refresh trays or offer a “wipe and swap” moment so children can see clearer colour differences again.
9. Invite children to look back at their prints alongside the flower images. Accept all interpretations and record any child comments on the back once dry.
10. End with a predictable tidy: tools into a washing tub, hands washed, prints placed to dry, and a quick look at the drying area to notice different marks.
Learning Objectives
Children explore materials and techniques for printing and mark making, linking to Expressive Arts and Design. Children develop hand control and coordination as they press, dab, roll and lift tools, linking to Physical Development. Children use words, gestures or sounds to share choices and observations about colour, shape and pattern, linking to Communication and Language.
Adult Role
Stay emotionally attuned by noticing when a child feels unsure about mess, waiting, or sharing tools, and offer calm reassurance and clear boundaries. Model simple, accurate language for what is visible: colour names, shape words (circle, line, dot), and pattern words (same, repeat, next to). Step in to scaffold when a child needs help with paint loading, tool grip, or turn-taking, and step back when the child is repeating and refining their own method. Observe in the moment for changes in pressure, tool choice, and persistence, and use those observations to decide whether to offer fresh paper, a new tool, or more space. Hold responsibility for safe use of forks and tubes, manage paint amounts to reduce slipping, and keep the area organised so children can work independently.
Observation Cues
Chooses a tool for a reason (e.g. selects a fork for lines, a tube for circles). Repeats a print to make a pattern and notices when it changes. Adjusts pressure or paint amount after seeing a faint or smudged mark. Names colours or flowers, or uses descriptive words like “dots”, “lines”, “big”, “tiny”. Compares their print to an image and points out similarities or differences. Persists with a tricky tool (e.g. aligning a tube) and shows satisfaction when the shape appears clearly.
Time & Space
15–35 minutes, with flexibility for children to return for shorter bursts.
Table-based or floor-based messy play area with a wipe-clean surface, access to handwashing, and a separate drying space.
Materials
Safety
Age adaptations
Budding Adventurers
Add forks for line printing and offer three colours, keeping one tray as a “clean colour” option. Place two flower images nearby (e.g. daffodil and tulip) and invite children to notice differences in petal shapes without expecting copying. The adult supports pattern exploration by commenting on repetition and spacing, and offers a second sheet for children who want to try “another flower”. Introduce simple comparisons such as “more” and “less” paint when marks change.
Curious Investigators
Offer the full tool set and include a longer paper strip for children who want to create repeating borders or “garden rows”. Add a small area of scrap paper for testing prints before committing to the main sheet. The adult uses richer vocabulary (petal, stem, centre, pattern, repeat) and invites children to describe what their tool makes. Provide a way to label prints with the child’s chosen flower name once dry, using the child’s words.
Confident Discoverers
Add an optional challenge of creating two different patterns on one page (e.g. petal prints and stem lines) without setting a required outcome. Offer a wider range of spring shades and allow children to mix intentionally in a separate tray. The adult supports planning talk by asking open prompts about placement and repetition, and steps back for sustained work. Invite children to sort finished prints by “same tool” or “same pattern” and explain their grouping.
EYFS Links
Expressive Arts and Design: Children explore colour, texture and printing as a way to represent ideas about spring flowers, choosing tools and repeating marks to create patterns. Physical Development: Children practise controlled hand and finger movements as they grip tools, adjust pressure, and coordinate press-and-lift actions. Communication and Language: Children share preferences, name colours and flowers, and describe what they notice in their prints and in reference images, supported by adult modelling of clear vocabulary. Understanding the World: Children connect images of seasonal flowers to their own marks, noticing features such as petal shapes and centres and linking these to what they see in their environment.
Ethos adaptations
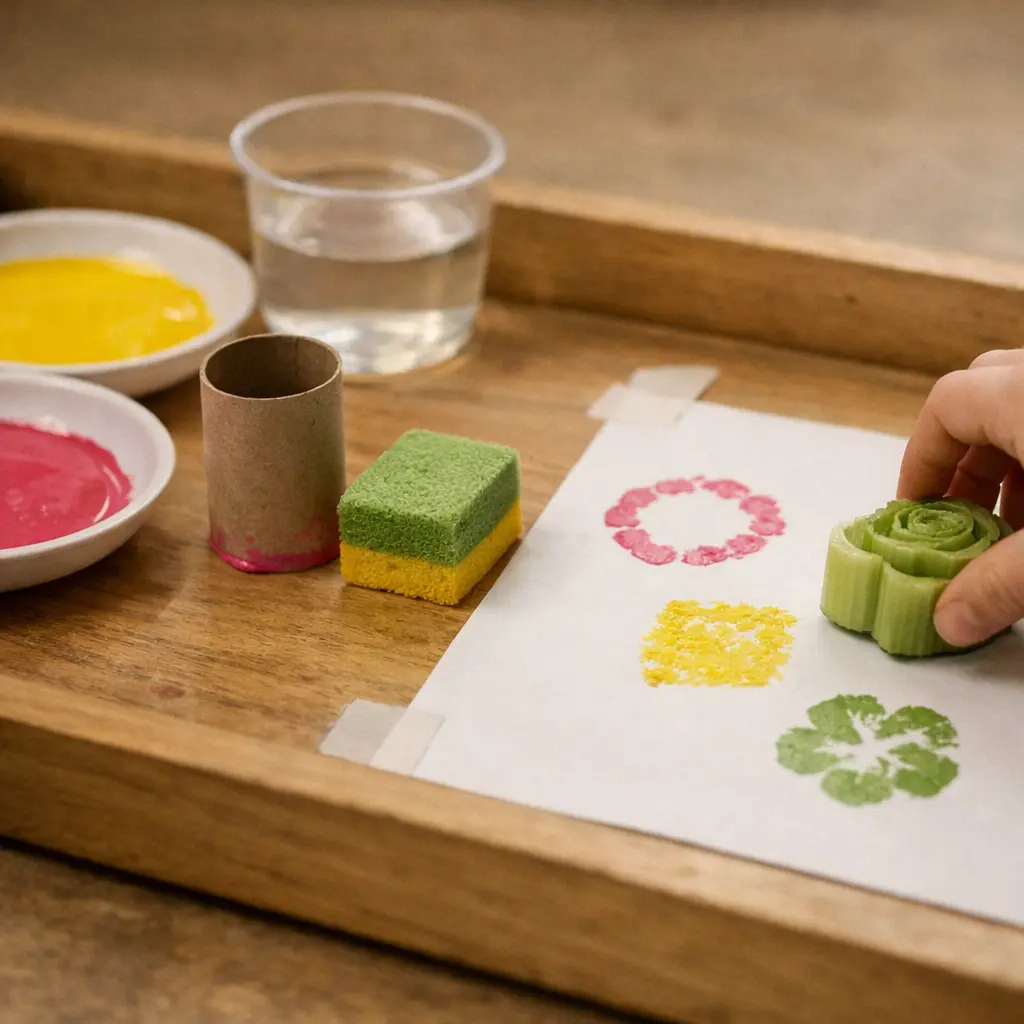
Prepare a low tray workspace with one taped sheet of white paper, a shallow paint dish with only two bright colours and water for rinsing, and a single chosen tool per child (toilet roll tube, sponge block or celery end) placed left-to-right in a clear order. Remove extra tools and photos so the sequence is simple: choose tool, dip to the shallow line, press and lift, then place to dry. This limits choices, highlights the repeated stamping action and makes paint amount and tool fit visible for self-correction.
Show the whole sequence once: slow, silent demonstration of dipping to the shallow dish, stamping to the paper, lifting and placing the tool back, then step back. Use only brief safety reminders thereafter and no ongoing prompts; offer more time or another tray only if the child asks. Observe for steady pressure, repeated marks, refinement of grip and lift, return to a favourite tool and clear signs of focused concentration rather than directing the next mark.
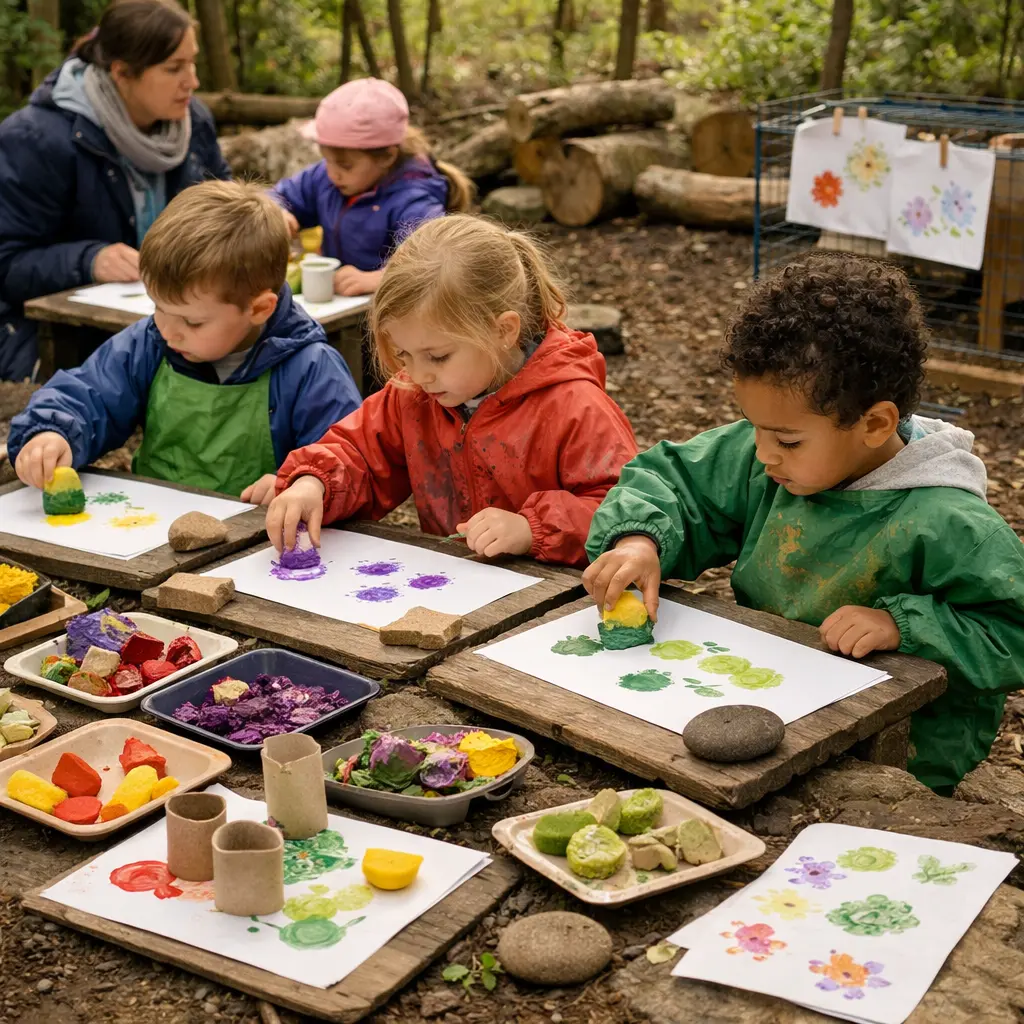
In an outdoor or nature-integrated space such as a garden, courtyard or sheltered play area, set up low tables or clipboards on logs and grass with paper secured by stones or clips rather than tape on a table. Materials are arranged as open-ended options: washable paint in shallow trays, real flower heads, petals, leaves, trimmed celery ends, sponges cut from old cloths, short recycled cardboard tubes and smooth stones for pressing. Children may collect safe natural bits nearby to add varied textures and imperfect shapes.
The adult observes from close by, checking anchors and modelling one or two short actions (a single press or lift) then stepping back to offer minimal, responsive language like a single word or question. Children choose tools, experiment with pressure, repeat marks and return to favourite items across sessions while the adult intervenes only to manage safety, help with paint levels or offer a concise prompt to extend a child’s idea.
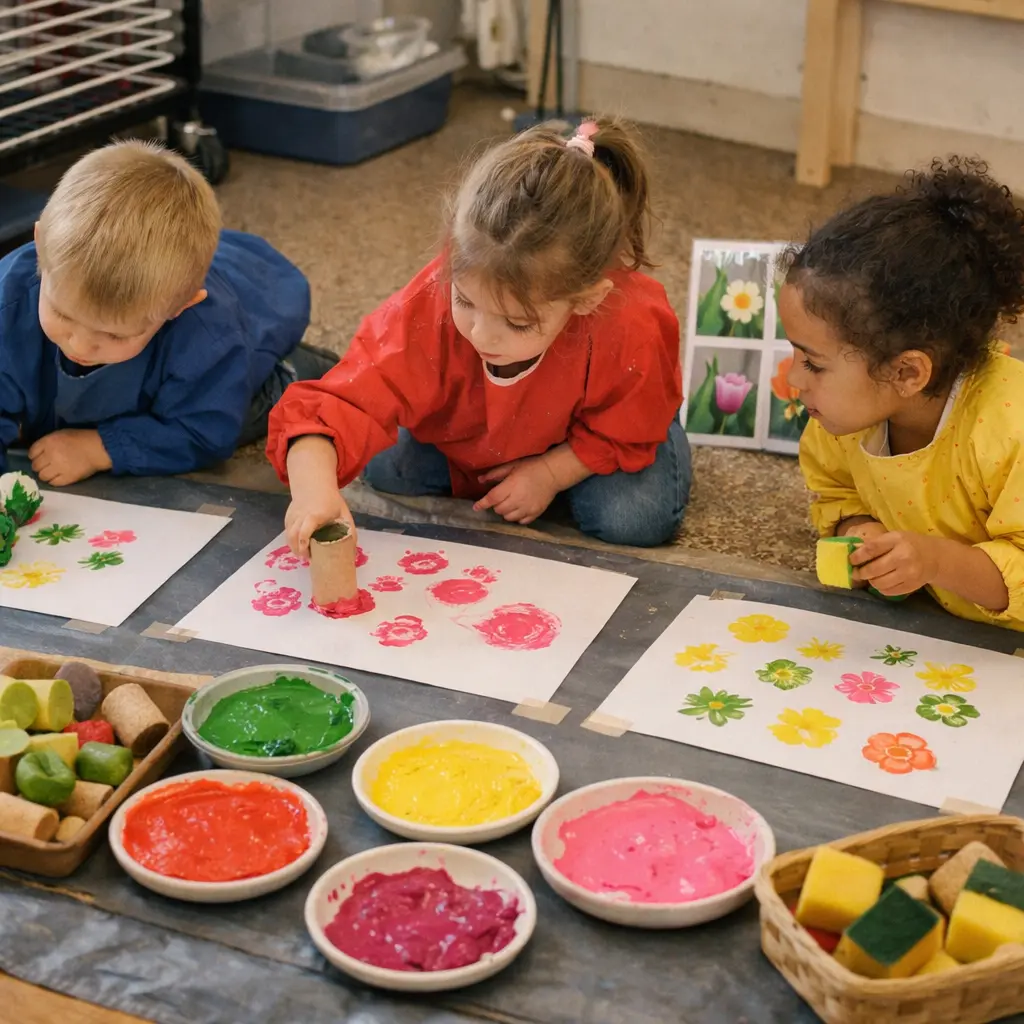
Sheets of white paper are pinned flat within easy reach on a low table or tray and a cluster of open bowls holds paint, tubes, sponges, vegetable ends and loose natural items so children can choose and combine tools. Materials are arranged in small reachable stations (paint, rollers/sponges, natural stamps, images) rather than handed out as tasks; aprons, wipes and the drying area remain accessible. Tools are left unscribed so the child may invent new ways to press, roll or layer colour for high-contrast flower marks.
The adult steps back as observer and co-researcher, using commentary such as “I can see the round marks joining” or “What happens if you press more lightly?” rather than giving steps. The child may return to a favourite tube, test pressure, or mix an unexpected tool with a celery end and develop repeating patterns over days. The adult notices changing grip, repeated motifs, naming attempts and moments of pause or comparison and records short observations alongside the child’s words to support EYFS goals in mark-making, coordination and language.
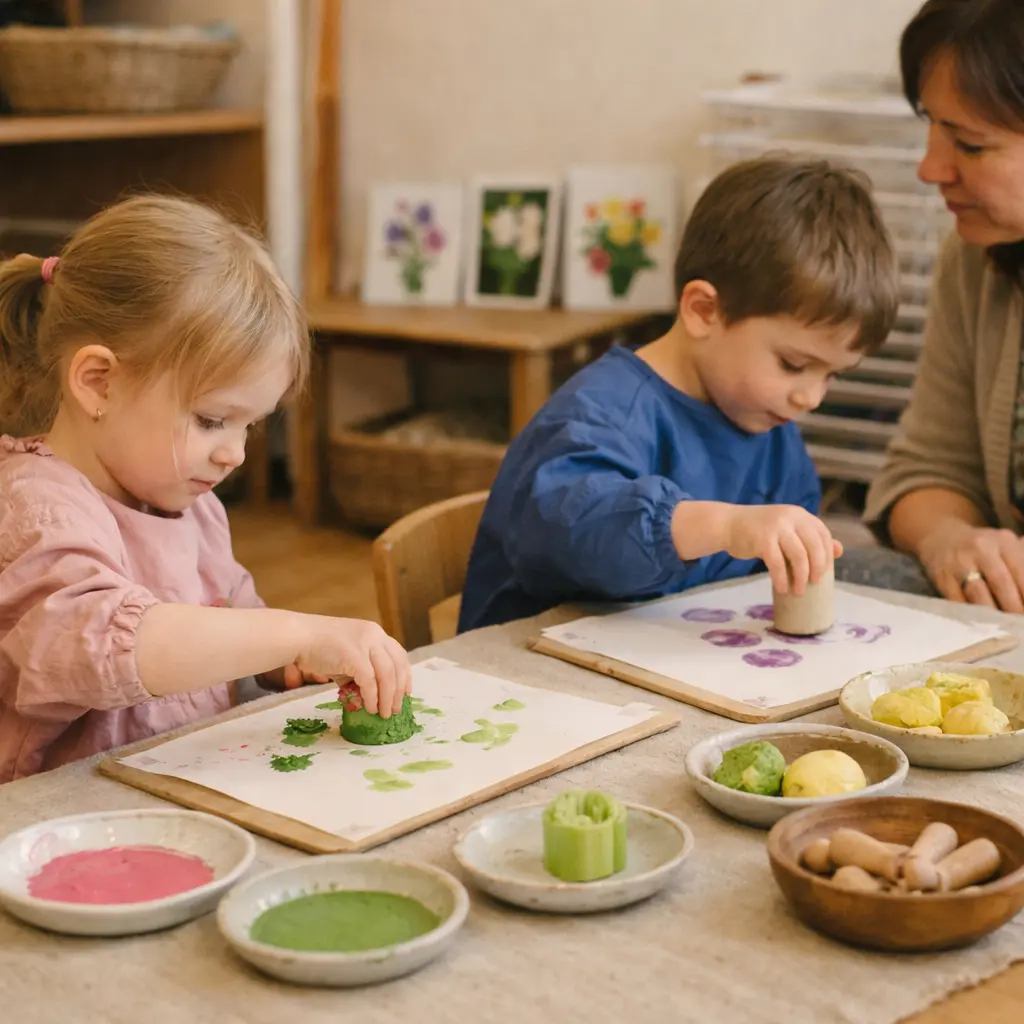
Steady, contained work areas are set on a neutral cotton cloth or tray with only a small number of items provided: A4/A3 white paper taped to the tray, short cardboard tubes, vegetable ends (celery, potato), natural sea sponge pieces and a few wooden-handled blunt tools set in shallow ceramic dishes. Paints are muted vegetable dyes or diluted earth/watercolour pigments in soft spring tones; no bright synthetic colours or plastic accessories are present. Aprons, wipes and a drying area remain at the edge for safety.
The adult demonstrates a calm press-and-lift motion quietly and without step-by-step instruction, remaining nearby as an observant anchor and modelling steady rhythm. The child returns to favourite tools, repeating marks at their own pace and exploring pressure and placement; the adult speaks minimally, intervening only for safety or to show a simple movement, and may label a child’s words on a finished sheet once prints are dry.