Daily open-access mark making with paper, varied tools and shape-making aids
Communication and Language
Children access paper and a small range of mark-making tools as part of the everyday environment, with optional shape aids available for those who seek them out. The experience supports exploration of lines, pressure and early symbols, with children choosing how long to stay and what to repeat. Adults pay attention to tool choice, grip changes and persistence, and adjust the selection to keep it manageable and inviting.
This is an everyday, open-access mark-making invitation where children choose from paper and a small range of tools to make marks in their own way. Children may explore pressure, direction, speed and repeated patterns as they draw, scribble, trace or fill spaces. Adding simple shape-making aids can widen what children notice about lines and outlines without turning the experience into a set task.
Step-by-Step Guidance
1. Prepare a consistent mark-making area that stays available each day, with a clear surface and enough elbow room for more than one child.
2. Place a reachable stack of paper and a small, curated set of mark-making tools in an open tray so children can select independently.
3. Add one or two shape-making aids (for example, a rounded-edge ruler and a large stencil) and keep the selection stable for several days before rotating.
4. Present the area by briefly showing where paper and tools belong, and how to carry items safely; keep the introduction short so children can begin exploring.
5. Allow children to choose tools and paper size; offer a clipboard or board if the paper slides, and tape paper down only when needed.
6. When a child shows interest in rulers, stencils or shapes, demonstrate one simple action slowly (such as holding an item steady) and hand it back for the child to try.
7. Model a small amount of descriptive language about what you notice (lines, curves, dots, long/short, inside/outside) without directing what to draw.
8. Support sharing by offering duplicates where possible and by naming turn-taking needs; avoid removing tools mid-use unless safety requires it.
9. Close the experience by inviting children to place tools back in the tray; store any kept work in a consistent place, and leave the area ready for the next child.
Learning Objectives
Children may develop fine motor control and hand–eye coordination through repeated mark-making (Physical Development). Children may explore ways to communicate ideas, feelings or experiences through marks and early symbols (Communication and Language). Children may experiment with line, shape and pattern as part of creative exploration (Expressive Arts and Design).
Adult Role
Stay emotionally attuned by noticing when a child is tentative, frustrated or proud, and respond with calm presence and simple reassurance. Model language that describes actions and effects (e.g. pressure, direction, line, edge, around, through) and reflect children’s meanings when they indicate their marks represent something. Scaffold only at the point of need: stabilise paper, offer a thicker tool, or demonstrate how to hold a stencil still, then step back quickly to keep the child in control. Observe in action by watching tool choice, grip changes, persistence and any emerging symbols, and use this to decide what to rotate or repeat. Hold responsibility for safe use of tools, spacing, and appropriate materials for the youngest children.
Observation Cues
Chooses a tool and adjusts grip, pressure or hand position over time. Uses repeated movements (back-and-forth, circular, dots) and notices the effect on the paper. Shows preference for certain tools or surfaces and returns to them across days. Attempts to copy a line or outline using a ruler, stencil or shape, or makes their own boundary lines. Names or indicates meaning in marks (e.g. points, gestures, brings an adult over) even when marks are not recognisable. Persists with a tricky action (holding paper steady, keeping a tool within a shape) and seeks help in specific ways.
Time & Space
Available daily; individual engagement often 5–20 minutes, with flexible return visits.
A consistent, open-access table or low shelf area with enough space for 2–4 children to work side-by-side, plus a nearby place to store paper and tools at child height.
Materials
Safety
Age adaptations
Budding Adventurers
Increase choice to include pencils alongside crayons and felt tips, and introduce a short, rounded-edge ruler for making long lines. Offer a couple of large stencils and two or three flat shapes for drawing around, keeping the set consistent for a week to allow familiarity. Support emerging control by naming “start/stop”, “edge”, and “around”, and by helping children organise space on the table when materials spread out.
Curious Investigators
Provide a wider range of paper sizes and add a small set of stencils that include different shapes to compare. Include rulers and a few flat shapes that can be combined to make new outlines, and offer clipboards for children who prefer working away from the table. Encourage children to notice differences between straight and curved lines and to revisit marks to add detail, while keeping the activity child-led rather than product-focused.
Confident Discoverers
Offer pencils and fine felt tips alongside thicker tools so children can choose the level of detail they want. Add more complex stencils and a couple of rulers so children can plan shapes, borders or repeated patterns, and provide larger sheets for big designs. Support children to talk about their choices (tool, line type, shape) and to persist with careful tracing or outlining, stepping in mainly to help with sharing, organisation and safe handling.
EYFS Links
Physical Development: Children practise the small-muscle movements needed for controlled mark-making through gripping, pressing, and moving tools across paper, with adults adjusting materials to match current control. Communication and Language: Children may share meanings through marks and gestures; adults can model vocabulary for actions and features (line, curve, edge, around) and respond to children’s attempts to explain. Expressive Arts and Design: Children explore how different tools and aids change what is possible on paper, experimenting with pattern, shape and personal representation without a fixed end product.
Ethos adaptations
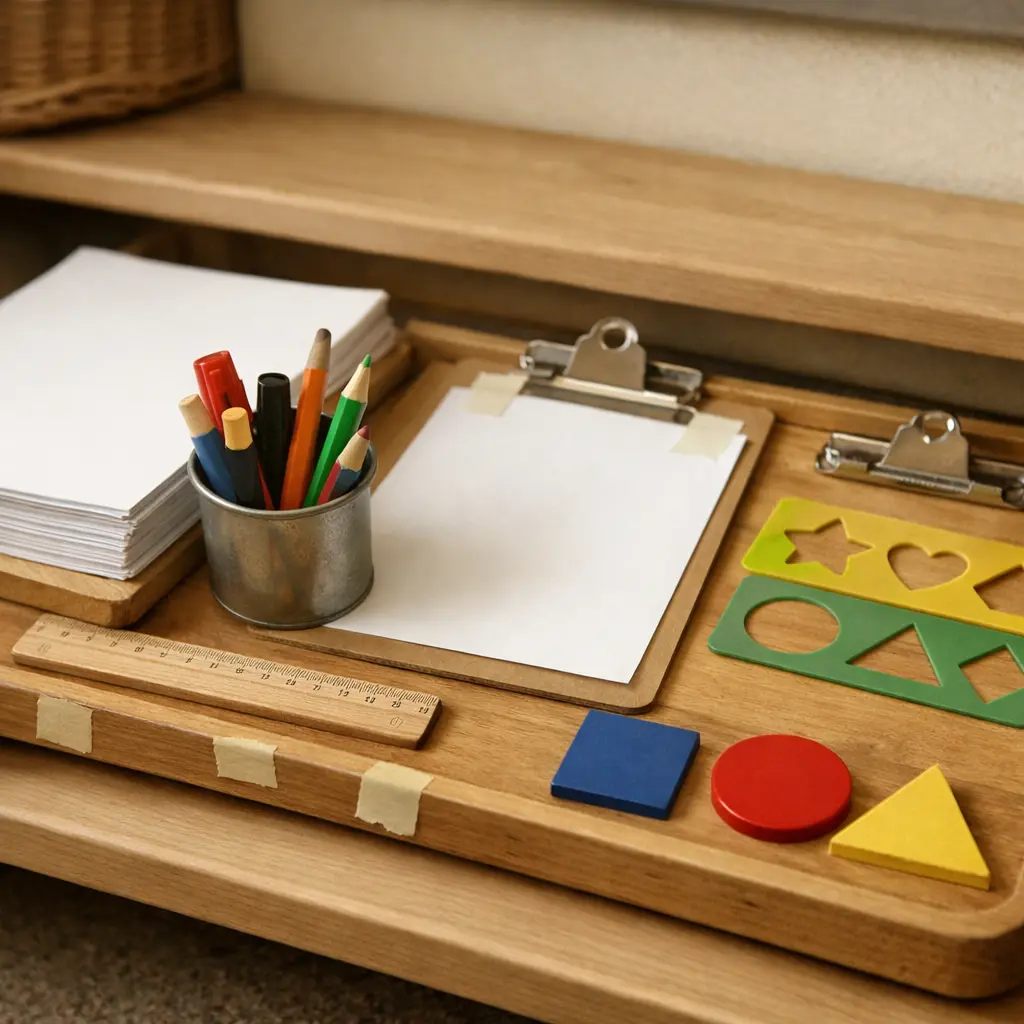
Place one shallow tray on a low shelf with a reachable stack of paper (A4 on top, a few larger sheets behind), two clipboards, and a small pot holding 6–8 mixed tools. Offer just one ruler, three simple stencils and three flat shapes at a time; store extras out of sight and rotate later. Pre-tear a few short masking-tape tabs on the tray edge. Arrange left-to-right: take paper → fix to board → choose one tool → choose one aid. This reduces choice, clarifies sequence, and isolates controlled mark-making.
Give one slow, quiet demonstration: take one sheet, secure it, choose one tool, draw a single straight line, then trace one shape while the spare hand holds it steady, return everything to its place, and replace the lid if used. Step back and limit words to brief naming on request or safety. Watch for grip changes, steady pressure, tool control when tracing edges, self-correction when the shape slips or lines go off the page, repetition, and periods of sustained focus.
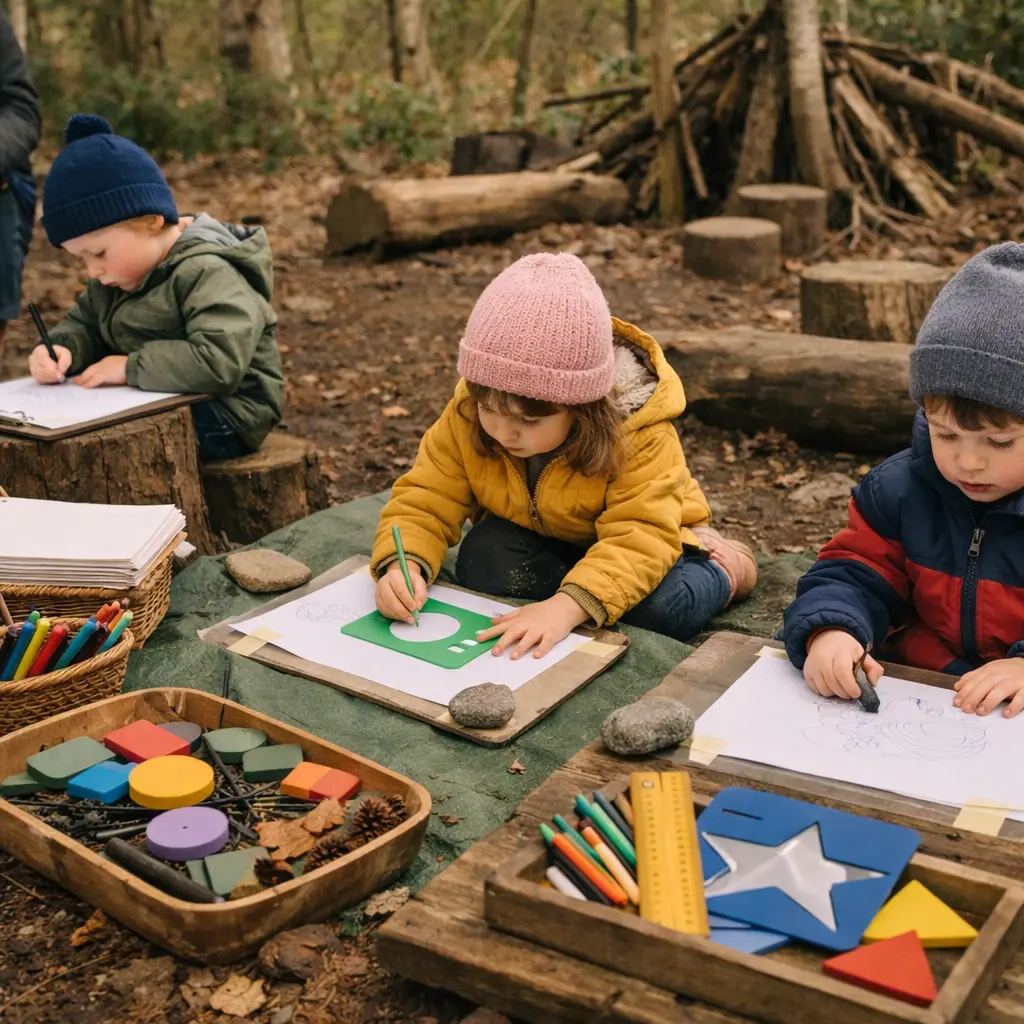
In an outdoor or nature-integrated space, set up low tables, clipboards on logs or flat stones and a sheltered mat so paper can be used on grass or a hard surface. Materials such as plain paper in reachable stacks, chunky crayons, pencils, washable pens, simple large stencils and natural options (charcoal sticks, bark, leaves) are provided in an open-ended way rather than pre-arranged. Materials are arranged in shallow trays or baskets and some sheets are weighted with stones or pinecones so children may take, return and choose tools and textures independently.
The adult observes from nearby, checks surfaces and tool safety, offers brief one-word prompts or short questions and models calm handling only when needed. Children choose where to work, which tools or natural marks to use, whether to secure paper or work freely, and may repeat, vary pressure or combine stencils and leaf rubbings at their own pace. The adult responds with concise observation, steps in to manage risk and then steps back to allow child-led exploration without a fixed outcome.

Arrange a permanent mark-making area with paper stacked at child height, some sheets already taped to a vertical surface and others paired with clipboards or a firm board on floor and table spots. Place crayons, pencils, and felt tips in a shallow, visible pot; set rulers, simple stencils, and flat shapes alongside as loose parts rather than a task. Children can choose surface, paper size, and orientation, move with a clipboard, tape their own paper, and combine or ignore shape aids to explore lines, outlines, and patterns.
The adult lingers nearby as co-researcher, offering descriptive language rather than steps: “I can see long, fast lines,” “You’re trying the edge of the shape,” “What happens if the paper is this way up?” Child direction may show in tracing, free scribble, arranging shapes before or without drawing, or switching tools to test pressure and speed. Observe grip changes, bilateral use (holding shape and tool), repeated motifs, self-talk or storytelling about marks, and how children start, pause, return, or abandon.
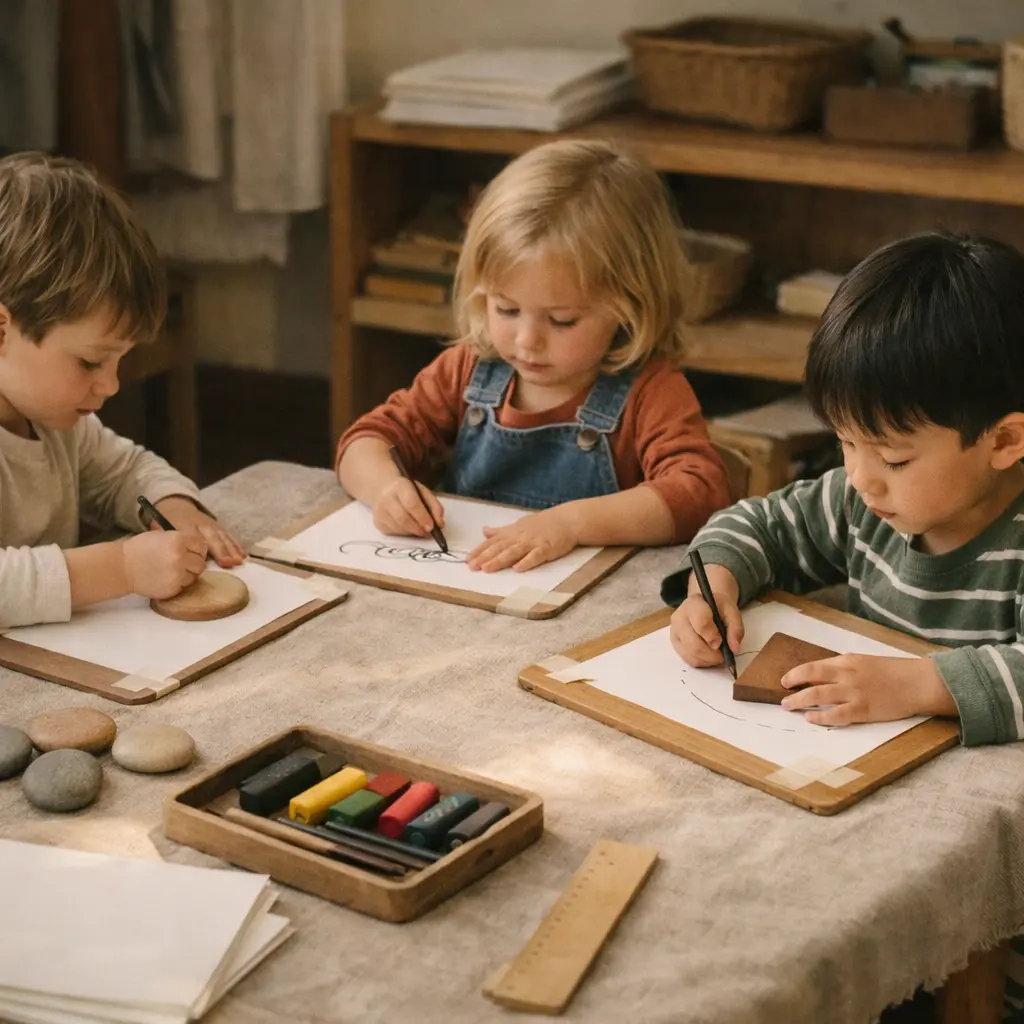
A calm table by natural light is set with a neutral cloth to define the space; only a reachable stack of plain off‑white paper (A4 and a few larger sheets) is offered. The materials are arranged simply: beeswax block crayons, graphite pencils, and a few sticks of vine charcoal in a wooden tray; smooth wooden clipboards or firm wooden boards for stability. Shape‑making aids are natural and weighty—sanded wooden circles, squares and triangles, a rounded‑edge wooden ruler, and a small selection of pebbles or shells to draw around. Paper tape is available to steady sheets.
The adult demonstrates one or two slow, quiet strokes and a single steady trace around a wooden shape, then steps back, remaining present and observant. Language is minimal, offered softly to name an action or quality only when the child seeks contact; the adult notices grip, pressure and comfort, adjusts tool size or secures paper as needed, and ensures safety. The child returns to their own pacing—scribbling, drawing, pausing, repeating lines, exploring speed and direction, or tracing edges of objects—revisiting the setup across days with the same small set of tools.